
In this week, I learned mainly about how to install Damn Vulnerable Web Application or usually known as DVWA . Below are the steps that I did to install DVWA in Kali Linux.
Step 1
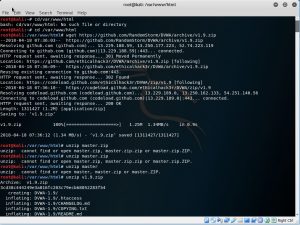
Firstly, change directory to /var/www/html using cd command. With the current directory, wget(web get) from a github link that my teacher has provided in the WhatsApp group for installing DVWA. So basically, it will copy/clone the files from that specific github url. From that site, I got v1.9.zip that saved in the current directory. Then unzip the zip file(v1.9.zip) to extract it to the directory.
Step 2
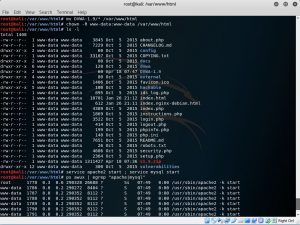
After the file has zipped, move the content from the directory DVWA-1.9 to the web root directory by typing mv DVWA-1.9/* /var/www/html. And then chown the directory to change owner. Check whether v1.9.zip is in the directory or not by using ls -l command. When the v1.9.zip is there, it means that the zip file is successfully loaded into the directory. To start the apache and mysql, use service apache2 start ; service mysql start. And lastly, type ps awux | egrep “apache|mysql”.
Step 3

In the picture above, it is mainly about setup the database such as name, password, and privileges. When the database setup is done, use nano to run the config.inc.php file.
Step 4
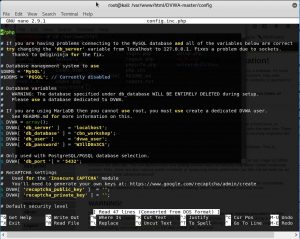
Above picture is the config.inc.php file. I configure it according to the database that I have set up before in step 3.
After that open the DVWA installation in the browser and create the database. Then type the username and password that I have set up before.
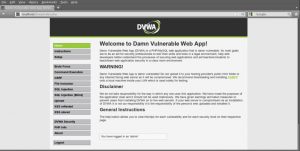
Finally, the site will show the frontpage of DVWA, means that I have successfully installed it. With DVWA, I could learn so many methods like Brute Force, Command Injection, SQL Injection and many other methods with various difficulty levels, with a simple straightforward interface.